Crossing the Border Between Costa Rica and Nicaragua

Comment 1 Standard

We were unable to book transportation into Nicaragua at our hostel in Costa Rica because the shuttle service needed a minimum of four passengers before it would operate. Because we wanted to get on with the next chapter of our travel, we decided to chance public transportation on our own.

Foolowing the instructions from the receptionist at our hostel, which I finally asked her to write down after getting her to confirm twice, we left our hostel in Arenal at 5:30 in the morning (sorry to our dorm mates). We went to the Super Mega grocery store in town, and just down the street we found the bus stop. We had a bit of a wait here, and at 6:30 we caught a bus to Tonque ($2 per person). It was only about a 15 minute ride. When we got off the bus in Tonque, we crossed the street and waited at another bus stop for the 7:15 bus which would take us to the Penas Blancas border crossing ($8 per person).

IMG_1768

We got off the first bus where the person is on their bike, and this picture is taken from the bus stop where we were waiting for the 7:15 bus to Penas Blancas border crossing. 

This was a very long journey. The bus seats were hard plastic and the bus ride was 5 hours long. We had one bathroom break at a road side stop where there was also food available.

When we got to the border crossing we were a bit overwhelmed. We gathered our packs and followed the crowd of people going to pay their exit fees. There were lots of people trying to tell us where to go and I am not sure if they were all trustworthy. We kept our heads down and made it to the lineups where we paid an $8 exit fee per person. Now we had to try and figure out what was next. We headed back across the road and finally decided to go into the building and fill out our paper work, then get in line.

From here we walked across the border and were bombarded by people wanting to help us. One man just wouldn’t leave us alone and insisted on staying by our side. We had to pay our entrance fee of $13 per person at a small hut, and then take a piece of paper into another building that was almost like airport security. Finally, escorted by our “helper” we were outside again and being put into a cab. He wanted a lot of money from us, and we eventually settled on a much smaller price for his “help” then he originally demanded. I am not sure how to avoid these people, but if you can it will save you a few bucks and a lot of hassle.

Once we were in our taxi we were able to settle down from the excitement/anxiety of crossing the border. We paid $35 to be driven to the San Jorge ferry docks. We found the ticket office there and paid $10 for our tickets. We had a bit of time to get a snack while we waited for the ferry.

IMG_1770

IMG_1773

It was a short but tumultuous ferry ride over. We were seated in the lower part of the boat and it was a head-between-your-legs kind of trip. Once we got across we almost immediately caught a bus ($1) which would take us around the island to the small town of Merida.

Overall, the process of crossing the border from Costa Rica to Nicaragua was quite smooth. It certainly cost a fraction of what it would have to pay a travel agency to escort us across. If you are for comfort and ease, don’t go this route. If you are more interested in getting to Nicaragua on the cheap- try it! I feel like if we can do it, anyone can! Good luck.

Pin for later!

IMG_2265

Tourist Adventures in Arenal, Costa Rica

Leave a comment Standard

We flew into the Arenal National Park area of Costa Rica from Bocas Del Toro, Panama via Nature Air. The travel time was a little over 5 hours, partly because our flight out of Bocas was over an hour late. We thought the plane we boarded in Bocas was small, but after a brief stopover in San Jose, we boarded an even smaller plane for the final lag of the journey! It was a shakey flight but we made it safe and sound. From the Arenal airport we took a taxi ($15US) to our hostel- Arenal Backpackers Resort.

It was late in the afternoon by the time we checked into the hostel ($15/p.p for a bed in a shared dorm). Luckily we were close enough to the downtown area that we could walk into the center and stroll around. We settled in for supper at Lava Lounge Bar and Grill where we enjoyed a Santa Fe Wrap and a pasta dish, as well as a pitcher of Sangria.

When we got back to the hostel we booked our tours for the next day ($300 US) through the reception and hung out in the lobby which had a very comfortable atmosphere, complete with bar tables and couch-style loungers. Arenal Backpackers Resort has a restaurant and bar which offers up tasty treats and delicious drinks.

The next morning we were up early to get the shuttle from our hotel to join our Pure Trek Canyoning tour.

The shuttles dropped us off so we could board the back of the trucks pictured above. It was a bumpy but fun ride up the volcano. Once we got to the top we were outfitted with the safety equipment we required and taught everything we needed to know in order to have a safe morning on canyoning. And before we knew it- we were doing it! The tour took us down 3 waterfalls and one rock wall. There was also one point where we had to do a Monkey Drop, which was a zip-line through the air followed by a quick, yet controlled, drop to the ground.

dscn6888j-58

dscn6888j-71

Once we had made our way through the rainforest we were transported back into Arenal where we enjoyed a lunch prepared by Pure Trek staff. At that time we were able to purchase a CD with all of the pictures from the morning ($25US). Then we were dropped off back at our Hostel.

We had just enough time to enjoy a relaxing few moments in the hammocks at Arenal Backpackers before being picked up for our second adventure of the day.

This time, we were off for a zip-lining adventure with a tour company I cannot remember the name of. We did 12 zip-lines, with one of them being almost 1000 m long, and very high up over a waterfall. It was terrifying, yet exhilarating, like all good adventure is.

OLYMPUS DIGITAL CAMERA

After just one full day of adventure we had to get ready to move on the next morning. We were heading to Nicaragua, and unfortunately were unable to book transportation due to their requirement of having at least 4 people booked. We were ready for an early morning adventure trying to find our way into Nicaragua using Public Transit!

Check out a video of our zip-line adventures here, and a video of canyoning here.

img_2117


Discovering Bocas Del Toro

Comment 1 Standard

After crossing the border from Costa Rica to Panama, we were picked up by a tour company booked through Gecko Trail and continued on our way to Bocas Del Toro. We had a short wait in a small port town, and then were loaded onto a boat and off we went to the Islands themselves! We were lucky to have smooth waters for our transfer to the Islands, which took around 40 minutes.

img_1346


We arrived at Bocas Del Toro’s main Island without any booked accommodations so we set off to find our home away from home first thing.

Not surprisingly, it was hard to find accommodations. We ended up staying in Hostel Heike, which was one of the hostels we had looked into before arriving. As far as hostels go, this one was just fine. The only availabilities were two beds in a ten-bed dorm, and while it was fine, we did try to find different accommodations for our second night, but didn’t have any luck.  Hostel Heike was a very busy place and there were always a lot of guests trying to use the very tiny kitchen, including in the morning when we tried to make our “complimentary breakfast” which meant a big batch of pancake mix that you made yourself whenever you could get a turn.

Overall, for $15 it was a good place to stay and was on par for most of the hostels we’d experienced in Central America.

img_1550

The view from the top bunk


img_1578

On the third day we were able to find accommodations at Isla Chica, which was a bit more expensive but we had a private room with AC and our own bathroom. It felt like paradise.

img_1569


What did we do in Bocas?

We went diving!

Travis was already PADI certified prior to this trip, so I had some catching up to do! Before leaving home, I completed part of the course by signing up for PADI Open Water Diver online.  I did some research using Trip Advisor and by sifting through numerous blogs, and decided to contact La Buga Dive and Surf. Because their responses were both timely and friendly, I felt confident in booking with La Buga to get my PADI certification.

OLYMPUS DIGITAL CAMERA

La Buga’s Dive Boat

OLYMPUS DIGITAL CAMERA

I spent the morning of our first day learning and reviewing in a “classroom setting” (aka sitting on the dock outside of the dive shop) and then we did two dives our first day. My instructor was the owner, Tony, and it was a wonderful experience. I was quite nervous the first time we went under water, and to be honest I only lasted a few moments before going back to the surface. Once I was back above the water, Tony joined me and was both reassuring and comforting. He offered a few extra tips, and then we were able to go back down and complete the first several tasks necessary for certification.

La Buga has a huge boat for going to and from dive sights (the the photo above), and all the staff were there to assure you were safe and having a great time. I would highly recommend diving with La Buga Dive Shop while you are in Bocas, and if you aren’t already, it’s a great place to become PADI certified. After three dives on the second day, I was a certified Open Water Diver!


img_0174

Now I am a PADI certified Open Water Diver!!

Where we ate:

img_1602

Excellent breakfast and coffee selections

img_1600

We stopped here for snacks and ice cream

img_1725

A great meal at El Ultimo Refugio

img_1594

La Bugita is the restaurant attached to La Buga. It has great meal options for any time of day.

img_1564

Great Tacos!

We also took a tour to Starfish Beach (we paid to go on a private boat). It was later in the afternoon on the day we went, and we completely missed the crowds, but unfortunately we missed the Starfish as well! We only saw one, which was still pretty cool.

IMG_1718.JPGimg_1716

We actually ended up leaving Bocas for a couple of nights to visit another area of Panama, and then returning for a couple of days before flying back to Costa Rica right from Bocas Airport. We had a great exploring other parts of Panama, but to be honest I think we both would have been happy to stay longer and enjoy more of what the Bocas Del Toro Islands have to offer! It’s already on our list of places to return…someday!

img_1753

Crossing the Border from Costa Rica to Panama

Comment 1 Standard

One of my biggest concerns when preparing for our trip to Central America was crossing the borders between countries. Neither guide books nor blogs made it seem like it would be a smooth operation. I was worried about spending too much money, getting tricked into paying someone who wasn’t an official border agent, and basically just about getting lost!

Because I was feeling nervous about it we decided to book our transportation through Gecko Trail. They picked us up at our hostel in Puerto Viejo and drove us to the border crossing at Sixaola. Here’s what happened:

1.We got out of the van and waited in a short line up to pay our Costa Rica exit fee ($16US)

2.We got our bags out of the van, climbed up a small hill, and got into a line up at the Costa Rican custom building. Here we filled out our exit cards and handed them over along with our passports to get them stamped.

img_1546

Looking Back to the Costa Rica border

3. Next we walked over a fairly long bridge, and immediately waited in another line up to pay the Panama entrance fee ($6US).

img_1548

Walking the bridge between the borders.

4.Up until this point everything was fairly easy. Once we paid the entrance fee, finding the next stop was a bit more tricky. There were quite a few locals standing around, greeting us and pointing this way and that way. We were a little bit leery about who to trust, but we ended up taking a left and going down a big set of stairs, continuing on in the same direction, and then coming across this:

img_1549

Panama Migration Services

Here we waited quite awhile to get our passports stamped. When we paid our entrance fee we were given a tiny little piece of paper. Don’t loose this! You will need it when you get here.

5. From here, we went back in the same direction we had come from, back up the stairs again and then down the opposite side to the bus stop. Because we had arranged transfer with Gecko Trail, we luckily didn’t have to wait long before our bus arrived and we were on our way to Bocas.

The worst part of the whole border crossing was probably just dealing with the heat and our heavy bags! Confidence is key, as well as being prepared to ask questions and trust people. Why I would still recommend using a transfer company would be because with a company you do not have to wait for public transport which is sometimes sporadic and unreliable. I wouldn’t have wanted to wait around in the heat much longer than we had to.

The shuttle also ensures that you arrive at the town of Almirante and get dropped off right at a boat dock to take you to the Bocas islands. Public transit would drop you off at a bus stop and you would walk to the docks, having to wait for the next boat to come.

Overall, public transit is a lot more affordable. You will spend a lot of money if you pay a transport company, but it may be worth it if you are looking for piece of mind, reliability, and move from place to place as efficiently as possible.


What I Loved About Puerto Viejo

Leave a comment Standard

We arrived to Puerto Viejo in February of 2016. We came from Tortuguero (see how we got here at the end of this post), so we were in a shuttle bus that was willing to drive us around until we found available accommodation. We had our heart set on a private room at Hostel Pagalu but unfortunately they had no private rooms available, just a couple of beds in a dorm room. While we were trying to decide if we should take the dorm beds, another guest came and was basically waiting for us to decide if we were taking the last beds or not, so we decided to try another place. We were disappointed because Pagalu looked like a great place.

After humouring our driver and looking at a place that he recommended, we asked him to take us to La Ruka. It definitely had a unique vibe, and they had a private room available. We scooped it up and after our bus left us behind and they showed us to our room. To be honest, it had many of the characteristics of your typical hostel, like the door that looked like it had been kicked in, and the teeny, outdated bathroom. We decided to make the best of it though, and went back downstairs to rent bikes that La Ruka has right on site.

We spent the late afternoon cycling around Puerto Viejo and hanging out on the beautiful beaches.


img_1356

La Ruka Hostel

img_1358

An evening at the beach

We went to KOKi beach for supper later that night. It’s funky decor and ambiance had immediately attracted me to the place, and the food and drinks made us love it even more! This would be a great spot for a beachside meal anytime of day, or a cool place to hang out in either the afternoon or evenings for drinks or coffee.

The next morning we woke up with a plan. We were heading to Jaguar Rescue Center. We got up early and went to a nearby Soda for a quick breakfast, and then made the ten minute bike ride to the Rescue Center. We were there a little before it’s 9:00 opening and there was already a crowd. We waited near the back of the bunch, and when they opened the gates at 9:00 we got to…wait in line behind everyone else to pay the $20 per person. Once everyone had paid, they split us into two tour groups, and away we went.

img_1365

La Ruka

img_1366

La Ruka

I loved the Jaguar Rescue Center. It was so worth the $40 because you know your touristy-money is going right to the animals. Almost all of the people “working” at the Center are volunteers, so you are surrounded by these kind-hearted people who care so much about the animals. Admittedly, I am a huge softy, but the compassion and commitment to the animals of some of the volunteers brought tears to my eyes. Here’s a few of the animals who were being rehabilitated during our visit:

img_1374img_1396

img_1423img_1442

After we went to the Rescue Center we continued on down the narrow highway and had a wonderful afternoon hopping from beach to beach to enjoy the sun, sand, and sea.

img_1510img_1516


When we pulled into one beach area we saw a group of monkeys up in the trees above us. It was such a great afternoon and is one of our favourite memories from our whole trip.

img_1519img_1522img_1524


The fun and easiness of this day was exactly what we had hoped for on our holiday, and made us fall in love with Puerto Viejo.

Puerto Viejo has a lot of cool shops that we spent a lot of time browsing in and out of. It is a small and well laid out city and if you rent bikes it is so easy to get around. There are also lots of cool bars and restaurants that you can stop in for a drink or two or a bite to eat. It is so easy to see why people love it here. It was one of the highlights of our trip and a stop we would recommend to anyone traveling to Costa Rica.


img_0458


What I’m Packing for 3 Weeks in Central America

Comment 1 Standard

We are one week away from taking off for what will be my first back-packing adventure. It will also be my first time traveling for this lengthy amount of time (no, my time in Kiev doesn’t count- I lived there, I wasn’t traveling). So, I’ve been doing more than my share of research (aka Pinteresting) about how to pack efficiently. I am a notorious over-packer, and I’ve never been ashamed of it:

9672cfdc8a8432f81aa782ea09f40404

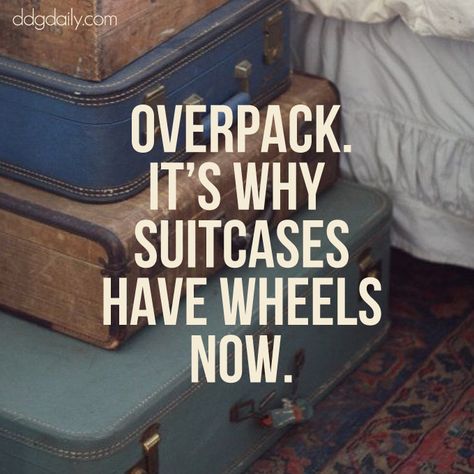
I couldn’t have said it better

I have gladly paid the “over-weight” charge at airlines time and time again. However, this time is different. This time, there will be no wheels. Only my back. And the only thing that might be worse than not having the perfect outfit or accessory is having to hike for 20 minutes to get to your eco-hostel with sore shoulders and the weight of the world on your back (I imagine it would be worse, anyways). 

So, after literally hours of research, planning, shopping, and preparing, here’s the breakdown of what I am packing (and what I am leaving behind):

My Carry-On

I know, it’s not pretty, but such is life when you’re about to become a backpacker. Even though it is not a classy or stylish shoulder bag, my carry-on is actually pretty cool. It’s a packable back-pack that is full size, but folds down into a built in pouch with a zipper. I will use it as my day pack while we are traveling as well. Apparently everything should serve more than one purpose if it is worth taking!

I am also sticking a small tote inside the backpack. I will put my cross-body purse and only the things I actually want to access during my flight in the tote, and then the backpack can go in the over-head storage compartment. More leg-room for me!

IMG_2692.JPG

One pouch filled with essentials after an entire day of traveling:

  • deodorant
  • a travel-sized toothbrush and “Toothy Tabs” which are an amazing product from Lush that are actual little tablets you use in lieu of paste. They are great for traveling!
  • lip balm
  • moisturizer

Another pouch is the Travel Safe Kit by Saje Natural Wellness. In this kit is:

  • Restoral Skin Ointment
  • Safe Hands sanitizing lotion
  • Arrive Revived mist and roll on
  • Eater’s Digest roll on
  • Sleep Well roll on (I will add this in- to help in those non-private rooms)

Other items I will carry on include:

  • 2 books
  • a journal and a pen
  • a vapour water bottle (so compact when it’s empty)
  • our Canon Power Shot S200 and case
  • our Olympus Tough Stylus waterpoof camera and case
  • chewing gum (for take off and landing)
  • a neck pillow- it is the tiny blue pouch you see in the picture. It is an Aeros inflateable pillow.
  • sleepy mask
  • ear plugs
  • ear buds
  • compression socks
  • power bank portable battery charger
  • infinity  scarf
  • iPad, iPhone, and charger
  • passport wallet
  • our trip itinerary (made by moi)

There are a few items that are not pictured that I will also include in my carry-on:

  • a change of clothes (just in case my pack doesn’t make it at the same time as us)
  • my make-up pouch
  • a small collection of jewellery
  • a few snacks

Now, that’s everything in my carry-on. Which will eventually have to be in my pack. I just put it all in, and it seems heavy. Uh-oh.

My Pack

Here’s the pack I chose, again, after much research and even a return. It is the Osprey Ariel 65L:

download

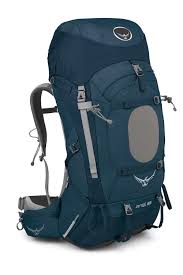
The perfect bag for me! Photo from osprey.com

I love this pack because it included the #1 thing that I wanted in a pack; a zipper on the front so that I don’t have to get at everything from the top. It has a J-zip all along the front panel, which is awesome for easy access and organization. It also has a zippered opening at the bottom. Another feature I like is the comfortable hip-belt that has built in storage right there, for easy access to things like your camera. I also purchased the Osprey Raincover (mostly for a couple of boat rides that I read will get you and your gear soaked) and the Airporter Travel Cover, which is a must to control all of those straps when you check your pack. I can’t wait to test this bag out! Stay tuned for a review.

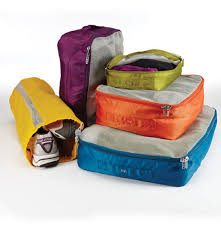
Most of the things inside my pack will be organized into my Lug packing cubes. These are essentials for me every time I travel.

download-1


Here’s my clothing breakdown:

  • 4 tank-tops
  • 3 t-shirts
  • 2 pairs of shorts
  • 2 pairs of capris
  • 2 dresses
  • 1 bunnyhug
  • 1 lightweight, packable rain jacket
  • 1 cardigan
  • 1 long-sleeved button-up shirt
  • 6 pairs of underwear
  • 3 bras – one strapless, one sports bra, one regular
  • 2 pairs of socks
  • 1 pair of pajamas- T-shirt and shorts
  • 3 bathing suits (I know, but they all have different purposes…)
  • 1 pair of flip flops
  • one pair of nice strappy sandals
  • 1 pair of Keen hiking shoes
  • 1 pair of Vibram 5-Toe shoes

I know it seems silly to be bringing two pair of such similar shoes. I bought the hiking shoes several months ago, and at the time didn’t think the toe-shoes were right for me. Then, after more research I realized if we wanted to go canyoning we would need something better suited for going in and out of water. That’s where the Vibram’s come in. They have great grips but are also more of a water shoe.I am still taking the Keen’s because I will wear them on days with long walks or hikes, and if we decide to go for a run. If I love the Vibram’s when we go canyoning, I will know for the future that they can also serve as my hiking shoes.

Technology/Toiletries and Extras

img_3208


In my Grid-It organizer by Cocoon:

  • camera charger and extra battery
  • USB charger hub
  • travel alarm clock (because I’m paranoid of our phones/iPads letting us down and missing an important wake-up call)
  • padlock for locking the zippers on my pack when it’s out of my sight
  • charger for iPad

Inside the small black pouch are items for my eyes and ears:

  • contact case and solution
  • extra contact lenses
  • glasses in their case
  • Q-tips
  • travel patches for motion sickness (they stick behind my ear)

Inside the larger clear case are items for showering and after-the-shower:

  • the world’s greatest razor which has allowed me to live a shaving-cream free life since high school: the Schick Intuition razor. Seriously, you should definitely try this product, for travel and for everyday!
  • one extra razor blade for my Intuition (just in case)
  • along with the world’s greatest razor I am bringing the world’s greatest shampoo! Lush’s solid shampoo bars are eco-friendly, and oh-so luxuriously made with essential oil and other natural products. They are good for up to 80 washes, and with their compact-size that fits into a Lush tin, they are perfect for travel.
  • moisturizer- I decided to take just a tiny bit as most days I would be slathering myself in sunscreen anyways
  • an extra tube of toothpaste (remember the Toothy Tabs from my carry-on?)
  • small bottle of perfume

Inside the clear/green case are my makeup essentials:

  • liquid foundation
  • concealer
  • brow shadow and brush
  • eye shadow
  • eye liner
  • mascara (one waterproof and one regular)
  • lip gloss

We bought a pre-packaged Medical Kit. Inside is:

  • bandages of different shapes, sizes, and functions
  • anti-septic wipes
  • mini-roll of duct tap
  • A wide array of medications to treat pain, inflammation, and common allergies.
  • a small set of tweezers
  • we also added our own Pepto Bismol, Advil, and Imodium tablets

Other items shown:

  • Beau & Ro clutch/belt bag
  • sunglasses
  • ZipLoc bag filled with sunscreen and high concentration DEET bug spray
  • my very own prescription diving goggles
  • small pouch for hair ties and a few pieces of jewelry

Other items not shown:

  • extra ZipLoc bags- for anything and everything
  • zip-ties for fascining zippers together on day pack or back pack if we are travelling by bus or other times when they may be out of our sight or we may be catching some shut-eye in public
  • flashlight and headlamps
  • aloe vera soothing cream (in case of sun burn)

Well, I’m sure that’s not quite everything, and in the next 6 days this list will likely change, but for now, this is it! Stay tuned for updates on what worked, what didn’t, and what we wished we had (or didn’t have)!

img_3209

Pin Me!